Installation
Tip
提示
You can skip installation completely by using our hosted Elasticsearch Service on Elastic Cloud,
which is available on AWS and GCP. You can try out the hosted service for free.
你可以完全跳过安装,使用我们在Elastic Cloud 托管的Elasticsearch Service,
可在AWS 和 GCP 上获得,你可以免费试用托管服务。
Elasticsearch requires at least Java 8. Specifically as of this writing,
it is recommended that you use the Oracle JDK version 1.8.0_131.
Java installation varies from platform to platform so we won’t go into those details here.
Oracle’s recommended installation documentation can be found on Oracle’s website.
Suffice to say, before you install Elasticsearch,
please check your Java version first by running (and then install/upgrade accordingly if needed):1
2java -version
echo $JAVA_HOME
Elasticsearch 需要至少Java8,特别是撰写本文时,推荐你使用Oracle JDK1.8.0_131 版本。
Java安装因平台而异,因此我们在此不会详细介绍。
可以在Oracle 网站找到Oracle 的推荐安装文档。
就是说,安装Elasticsearch 之前,请先运行java -version检查Java版本。
Once we have Java set up, we can then download and run Elasticsearch.
The binaries are available from www.elastic.co/downloads along with all the releases that have been made in the past.
For each release, you have a choice among a zip or tar archive, a DEB or RPM package, or a Windows MSI installation package.
一旦我们安装了Java,我们可以下载并运行Elasticsearch。
从www.elastic.co/downloads 可以获得在过去已经发布的所有版本的二进制文件。
对于每个版本,你可以选择zip 或 tar,DEB 或 RPM包,或 Windows MSI 安装包。
Installation example with tar
tar 安装示例
For simplicity, let’s use the tar file.
为简单起见,我们使用tar文件。
Let’s download the Elasticsearch 6.5.4 tar as follows:
我们按如下方式下载 Elasticsearch 6.5.4:1
curl -L -O https://artifacts.elastic.co/downloads/elasticsearch/elasticsearch-6.5.4.tar.gz
Then extract it as follows:
然后解压如下:1
tar -xvf elasticsearch-6.5.4.tar.gz
It will then create a bunch of files and folders in your current directory. We then go into the bin directory as follows:
它将在当前目录创建一堆文件和目录。然后我们进入到bin目录,如下所示:
1 | cd elasticsearch-6.5.4/bin |
And now we are ready to start our node and single cluster:
现在,我们准备启动节点和单个集群:1
./elasticsearch
Installation with Homebrew
使用Homebrew 安装
On macOS, Elasticsearch can also be installed via Homebrew:
在Mac系统,可以通过Homebrew 安装Elasticsearch:1
brew install elasticsearch
If installation succeeds, Homebrew will finish by saying that you can start Elasticsearch by entering elasticsearch.
Do that now. The expected response is described below, under Successfully running node.
如果安装成功,Homebrew 将完成通过说你可以通过输入 elasticsearch 启动Elasticsearch。
现在就这样做,在成功运行节点下,下面描述了预期的响应。
Installation example with MSI Windows Installer
MSI Windows Installer 的安装示例:
For Windows users, we recommend using the MSI Installer package.
The package contains a graphical user interface (GUI) that guides you through the installation process.
对于Windows 用户,我们推荐使用MSI 安装程序包。
该软件包包含一个用户图形界面(GUI),可指导你完成安装过程。
First, download the Elasticsearch 6.5.4 MSI from https://artifacts.elastic.co/downloads/elasticsearch/elasticsearch-6.5.4.msi.
首先,从https://artifacts.elastic.co/downloads/elasticsearch/elasticsearch-6.5.4.msi. 下载Elasticsearch 6.5.4 MSI。
Then double-click the downloaded file to launch the GUI.
Within the first screen, select the deployment directories:
然后双击下载的文件以启动GUI。
在第一个屏幕中,现在部署目录: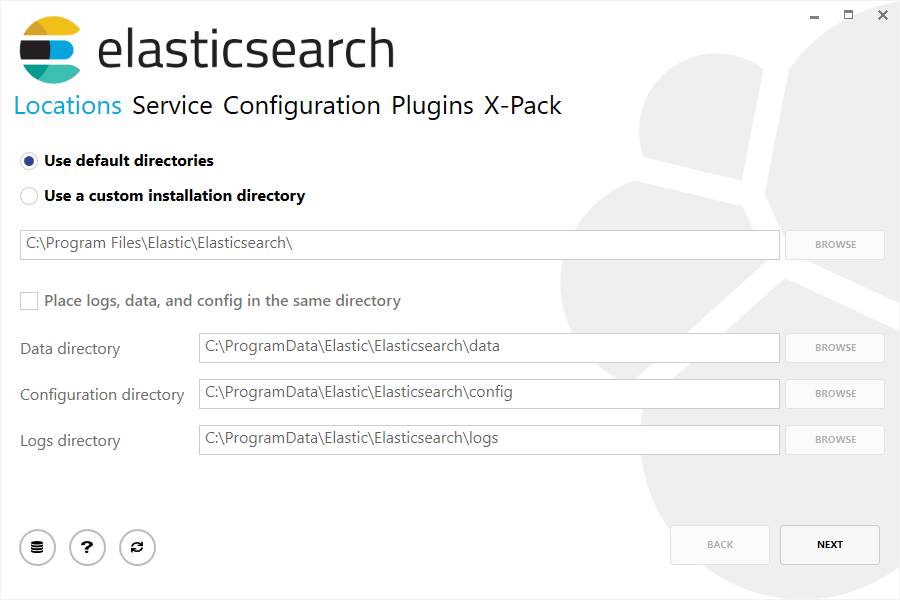
Then select whether to install as a service or start Elasticsearch manually as needed.
To align with the tar example, choose not to install as a service:
然后选择是作为服务安装还是根据需要手动启动Elasticsearch。
为了与tar示例一致,选择不作为服务安装。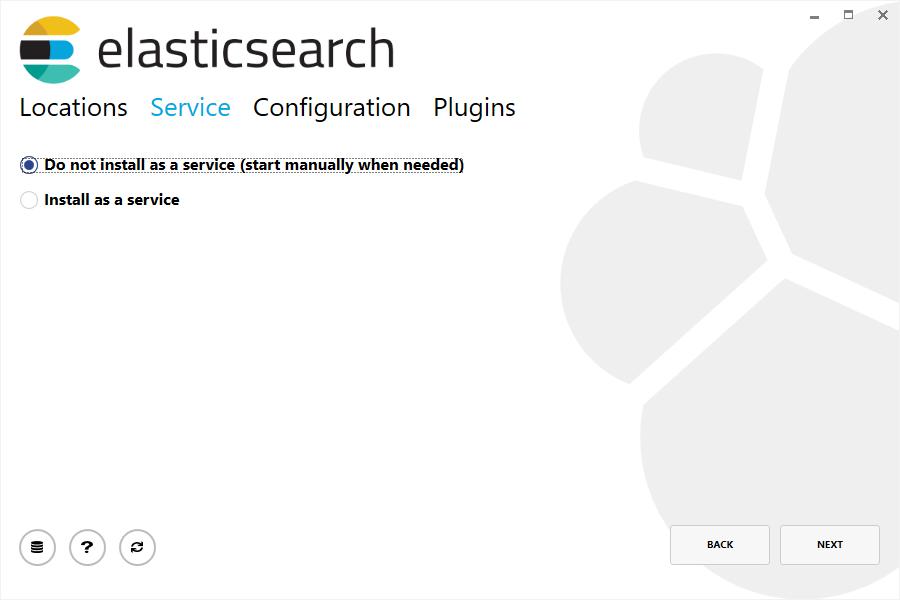
For configuration, simply leave the default values:
对于配置,只需保留默认值: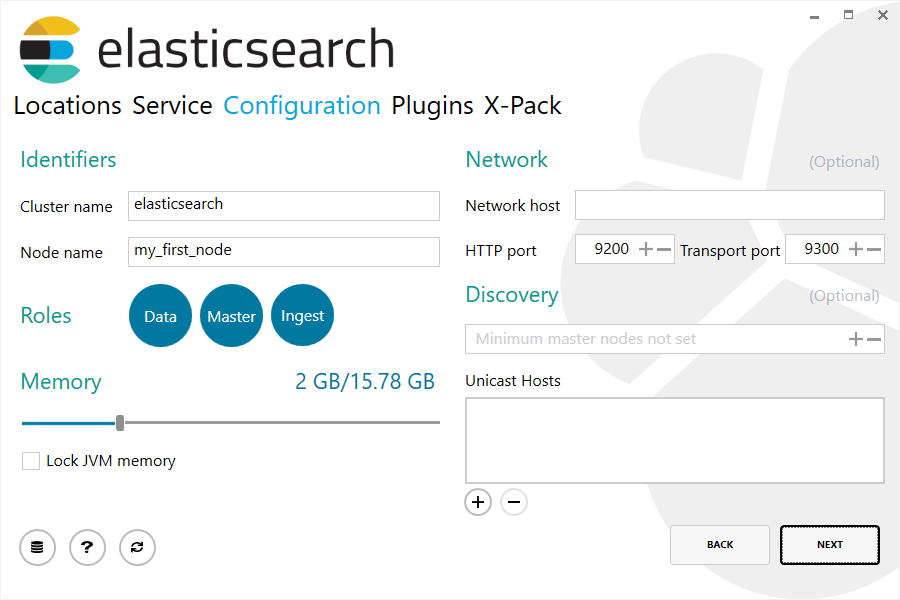
Again, to align with the tar example, uncheck all plugins to not install any plugins:
再次为了与tar示例一致,取消选中所有插件不安装任何插件: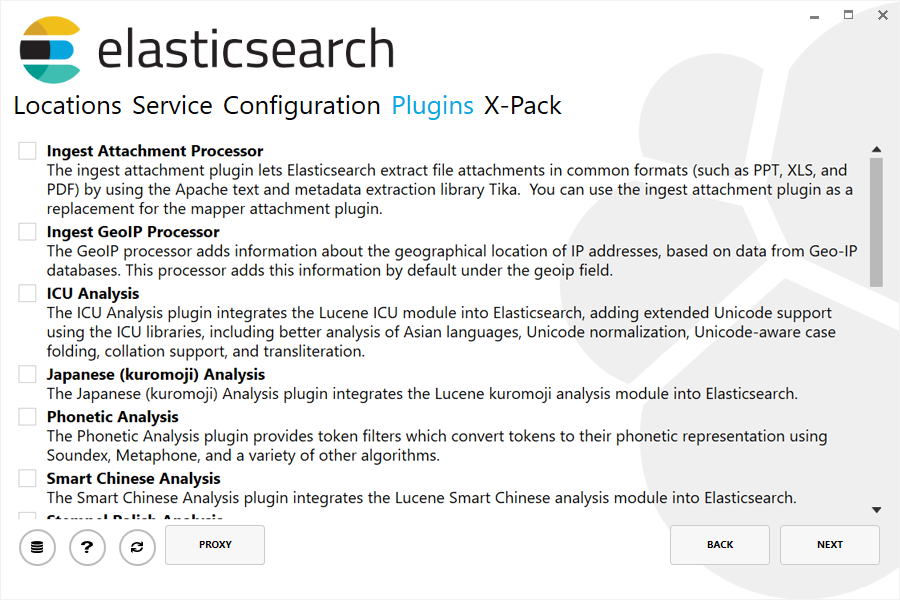
After clicking the install button, Elasticsearch will be installed:
点击安装按钮之后,将安装Elasticsearch:
By default, Elasticsearch will be installed at %PROGRAMFILES%\Elastic\Elasticsearch.
Navigate here and go into the bin directory as follows:
默认情况下,Elasticsearch 将被安装在%PROGRAMFILES%\Elastic\Elasticsearch 目录。
进入bin目录,如下所示:
with Command Prompt:
使用命令提示符:1
cd %PROGRAMFILES%\Elastic\Elasticsearch\bin
使用PowerShell
with PowerShell:1
cd $env:PROGRAMFILES\Elastic\Elasticsearch\bin
And now we are ready to start our node and single cluster:
现在,我们准备启动节点和单个集群:1
.\elasticsearch.exe
Successfully running node
成功运行节点
If everything goes well with installation, you should see a bunch of messages that look like below:
如果一切顺利安装,你应该看到一堆如下所示的消息:1
2
3
4
5
6
7
8
9
10
11
12
13
14
15
16
17
18
19
20
21
22[2016-09-16T14:17:51,251][INFO ][o.e.n.Node ] [] initializing ...
[2016-09-16T14:17:51,329][INFO ][o.e.e.NodeEnvironment ] [6-bjhwl] using [1] data paths, mounts [[/ (/dev/sda1)]], net usable_space [317.7gb], net total_space [453.6gb], spins? [no], types [ext4]
[2016-09-16T14:17:51,330][INFO ][o.e.e.NodeEnvironment ] [6-bjhwl] heap size [1.9gb], compressed ordinary object pointers [true]
[2016-09-16T14:17:51,333][INFO ][o.e.n.Node ] [6-bjhwl] node name [6-bjhwl] derived from node ID; set [node.name] to override
[2016-09-16T14:17:51,334][INFO ][o.e.n.Node ] [6-bjhwl] version[6.5.4], pid[21261], build[f5daa16/2016-09-16T09:12:24.346Z], OS[Linux/4.4.0-36-generic/amd64], JVM[Oracle Corporation/Java HotSpot(TM) 64-Bit Server VM/1.8.0_60/25.60-b23]
[2016-09-16T14:17:51,967][INFO ][o.e.p.PluginsService ] [6-bjhwl] loaded module [aggs-matrix-stats]
[2016-09-16T14:17:51,967][INFO ][o.e.p.PluginsService ] [6-bjhwl] loaded module [ingest-common]
[2016-09-16T14:17:51,967][INFO ][o.e.p.PluginsService ] [6-bjhwl] loaded module [lang-expression]
[2016-09-16T14:17:51,967][INFO ][o.e.p.PluginsService ] [6-bjhwl] loaded module [lang-mustache]
[2016-09-16T14:17:51,967][INFO ][o.e.p.PluginsService ] [6-bjhwl] loaded module [lang-painless]
[2016-09-16T14:17:51,967][INFO ][o.e.p.PluginsService ] [6-bjhwl] loaded module [percolator]
[2016-09-16T14:17:51,968][INFO ][o.e.p.PluginsService ] [6-bjhwl] loaded module [reindex]
[2016-09-16T14:17:51,968][INFO ][o.e.p.PluginsService ] [6-bjhwl] loaded module [transport-netty3]
[2016-09-16T14:17:51,968][INFO ][o.e.p.PluginsService ] [6-bjhwl] loaded module [transport-netty4]
[2016-09-16T14:17:51,968][INFO ][o.e.p.PluginsService ] [6-bjhwl] loaded plugin [mapper-murmur3]
[2016-09-16T14:17:53,521][INFO ][o.e.n.Node ] [6-bjhwl] initialized
[2016-09-16T14:17:53,521][INFO ][o.e.n.Node ] [6-bjhwl] starting ...
[2016-09-16T14:17:53,671][INFO ][o.e.t.TransportService ] [6-bjhwl] publish_address {192.168.8.112:9300}, bound_addresses {{192.168.8.112:9300}
[2016-09-16T14:17:53,676][WARN ][o.e.b.BootstrapCheck ] [6-bjhwl] max virtual memory areas vm.max_map_count [65530] likely too low, increase to at least [262144]
[2016-09-16T14:17:56,718][INFO ][o.e.c.s.ClusterService ] [6-bjhwl] new_master {6-bjhwl}{6-bjhwl4TkajjoD2oEipnQ}{8m3SNKoFR6yQl1I0JUfPig}{192.168.8.112}{192.168.8.112:9300}, reason: zen-disco-elected-as-master ([0] nodes joined)
[2016-09-16T14:17:56,731][INFO ][o.e.h.HttpServer ] [6-bjhwl] publish_address {192.168.8.112:9200}, bound_addresses {[::1]:9200}, {192.168.8.112:9200}
[2016-09-16T14:17:56,732][INFO ][o.e.g.GatewayService ] [6-bjhwl] recovered [0] indices into cluster_state
Without going too much into detail, we can see that our node named “6-bjhwl” (which will be a different set of characters in your case)
has started and elected itself as a master in a single cluster.
Don’t worry yet at the moment what master means.
The main thing that is important here is that we have started one node within one cluster.
没有太多细节,我们可以看到名为”6-bjhwl”的节点(在你的情况下,可能是不同的字符串)已经启动并且选择自己作为单个集群中的master。
现在不用担心master意味着什么。 这里最重要的是我们在集群中启动了一个节点。
As mentioned previously, we can override either the cluster or node name.
This can be done from the command line when starting Elasticsearch as follows:
如前所述,我们可以覆盖集群或节点名称。
这可以在启动Elasticsearch 的命令行完成,如下所示:1
./elasticsearch -Ecluster.name=my_cluster_name -Enode.name=my_node_name
Also note the line marked http with information about the HTTP address (192.168.8.112)
and port (9200) that our node is reachable from.
By default, Elasticsearch uses port 9200 to provide access to its REST API. This port is configurable if necessary.
另外请注意标有http的行,其中包含有关我们的节点是可以访问的http地址(192.168.8.112) 和端口(9200)的信息。
默认情况下,Elasticsearch 使用9200端口提供访问它的REST API。如果需要,这个端口是可配置的。